Learn how to build responsive components in Figma with ease.
Creating components with automated sizing behavior saves a lot of time during the process. They also let us think more like a developer that has to implement the real application. That is why it is essential to master Constraints and Auto Layout in Figma.
In this article, I would like to present you not only the features but also samples – how components benefit from sizing behaviors. Let’s begin with Constraints.
All examples in the tutorial come from Prime Design System.
Constraints
With Constraints, you may build components that adapt size and position to their environment (frame). Use it every time when you need to prepare designs that have to be resized for multiple platforms or breakpoints (responsive websites) and share the same UI elements.
Thanks to constraints, Figma knows how to modify the size and position of the specific element when its frame is resized.
You may choose multiple options when working with Constraints. The object may stick to the Left, Right, Left and Right, Top, Bottom, Top, and Bottom. If may be positioned in the Center, or even scale proportionally to the frame size changes.
Now, let’s some examples of real components made with various constraints properties.
Button Groups
Buttons inside the group should stretch their size to the needed with, but text or icons inside should remain centered. Thanks to constraints, it is easy to achieve it.
Inputs
TextFields and Dropdowns should stretch to fill their container space. However area for the text should be aligned to the Left & Right. For Dropdowns, the little chevron on the right should always stick to this side.
Cards
Cards may have various appearances, but their content should stick to specific areas. In this case Content of the card is aligned to stick left and bottom constraints.
Tables
Responsive tables are the essence of modern web solutions. Let cells scale to fit the needed space. However, the content inside should be aligned to specific edges (in most cases left).
Carousels
This component is popular in modern web designs. Building it in Figma is easy, thanks to constraints. The Next and Previous buttons stick to the left and right edges. They are also centered vertically. The page indicator is centered horizontally and pinned to the bottom of the carousel.
Auto Layout
Auto Layout is a Figma feature that is dedicated to build components and frames that adapts their size to the content inside of them (in the opposite to constraints that adapt to their environment changes).
Auto Layout is stacking elements next to each other inside the frame. They may be aligned vertically or horizontally. Figma supports only one direction at a time, vertical or horizontal. If you would like to build components that use both directions, you have to combine or nest a few auto-layout frames inside.
Auto Layout lets you set the spacing between elements inside and add padding to the frame that uses it.
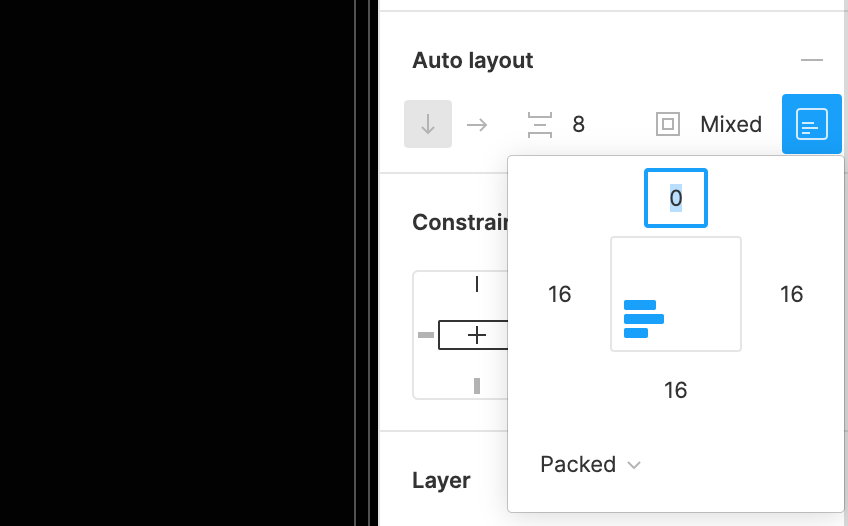
You also have multiple distribution options. Objects may be “Packed” (placed nearby) or distributed across the whole frame with the “Space between” option.
What is more important, you may align if the objects should stick specific horizontal side (left or right) and vertical (top and bottom). They may also be centered.
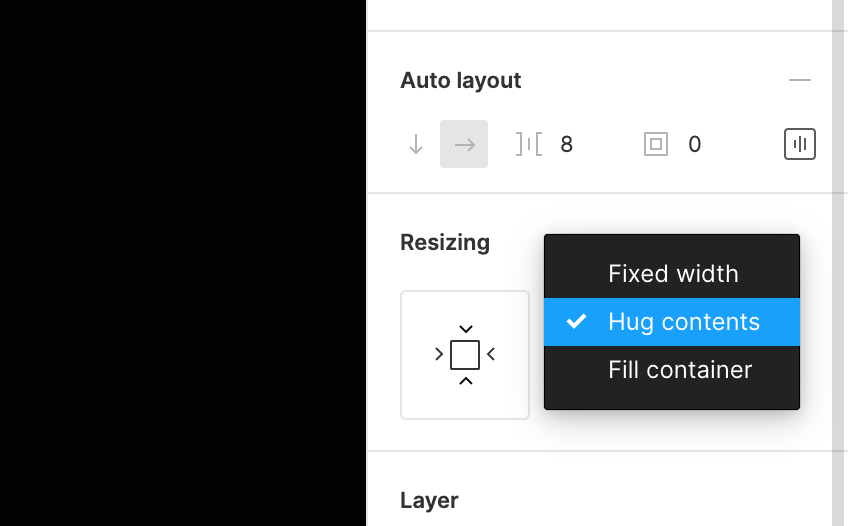
Elements inside Auto Layout may set the following resizing options:
- Fixed width or height – object maintain its size.
- Hug contents – element adapts to the content inside.
- Fill container – objects fill the container space.
You may add Auto layout to a frame or a selection of objects (that will be turned into a frame with the Auto layout). You may do it by clicking the plus button in the Auto Layout Section of the right panel or by clicking the “Shift + A” shortcut.
It is worth mentioning that Auto Layout has got some limits. You can’t do the following things to Auto Layout frames:
- Add Constraints to any elements within an Auto Layout frame
- Use Smart selection on any objects within that frame
- Add Layout grids to the frame with AutoLayout
Editing the order of objects in Auto Layout Frame is superfast. All you have to do is to select the component you want to move and drag it inside the container frame. You will notice smart guidelines that will highlight the drop area.
Now, let’s see how real design system components use Auto Layout to adapt the size to their content.
Buttons
One of the most-used components. The button should adapt its size to the text label width. It should also stretch if the icon appears inside of it.
The icon has got usually resizing options set to “fixed”, but the text label is set to “hug contents”.
Get Free Chapter
15,000+ designers are already subscribed (no spam! Only design tips, tutorials + design resource news).
Join now, get the free chapter of my eBook right to your inbox. With these tactics, you will solve common design issues with ease.
Sign up - Get Free Chapter
Menus
While menu items usually use Constraints, their container should benefit from Auto Layout. Elements are stacked vertically from the top and packed. Space between is optional in this case.
Tags & Badges
It is obvious that these tiny elements should expand and collapse their frame depending on the text content inside.
Modals
Popups and modals are also good examples of components that use Auto Layout. They should adapt to the amount of text content inside.
Pricing
Pricing Options are complex components that may be constructed with Auto Layout to expand its possibilities. While the elements should fill the container horizontally, they should hug content in vertical space. The list of features or benefits should expand the pricing panel.
For a more detailed Auto Layout description, you may follow official Figma documentation.
Pro Tips
There are some cases that require additional experience in using Constraints and Auto Layout. Here are a few of them that will help you in specific situations:
You do not have to use Auto Layout everywhere
Some components or screens may not need that. That is why constraints still play a huge role in Figma. Look at the examples from above; there are lots of components that do not have Auto Layout but are very useful.
Stretching Component with AutoLayout
When you create the set of Main Components with AutoLayout like Generic Buttons to use them later inside Components of a specific element (Primary Button, Secondary Button etc.), You may see that Auto Layout will work perfectly when you modify the content.

However, what when you want to manually adjust the width? Your Button instance does not stretch. So… do you have to prepare alternative Components without Autolayout? No.
If you want to have a manually stretched component – Figma allows overriding the resizing settings. All you have to do is to select the instance of the Primary Button and find the instance of the Main Button inside. Then change resizing option from “Hug Contents” to “Fill Container”. Voila! Now your button’s width or height may be adjusted manually without making another Component!
Constraints and Auto Layout works for Frames, not Groups
Groups do not have abilities to manage sizing like frames. Fortunately, if you want to turn Group into Frame to use Auto Layout, it is enough to select it and click Auto Layout plus button in the panel on the right. Group will become a Frame with Auto Layout.
Ignoring Constraints during resizing
Sometimes you may want to resize a Frame without using the Constraints that are applied to it (this could result in resizing and repositioning objects inside the frame).
You can ignore Constraints applied to the nested objects by holding down a CMD (Windows – CRTL) key while resizing the frame.
Summing up.
Auto Layout and Constraints are the features that every designer using Figma has to master. Practical examples always help to remember and visualize the benefits of the feature.
All the examples above are a few components from over 1800 included in Prime Design System. I made all pixel-perfect components work with constraints and auto layout, so I believe you will now have the knowledge to use it better in your projects.
If you have any questions on resizing components in Figma, let me know, or learn more Figma tips.
Thanks for reading!
By the way…
If you start a new project or would like to organize your UI Library in Figma — do not waste your time creating everything from scratch. Feel free to use the Prime — Design System Kit. It helps you design UI with the best Figma techniques — Component Properties, Variants, Auto Layout and more.See Prime in action.
To make it easier there is a gift 🎁 - Use UXMISFIT10 offer code to get 10% Off.

You can also Create User Flows faster in Figma & Sketch — With SQUID you can create User Flows directly in your favorite design tool. You may style them to your project brand within a couple of clicks. Prepare all kind of diagrams in minutes. See how it works.