
SQUID 2.0 is a User Flows library for Sketch and Figma. It allows you to create elegant Flows that fits your project brand super quickly. In this tutorial, I will show you how to configure and use the library for Figma to get most of it. If you use a different design tool, check out the SQUID for Sketch – Quick Start Guide.
What is SQUID?
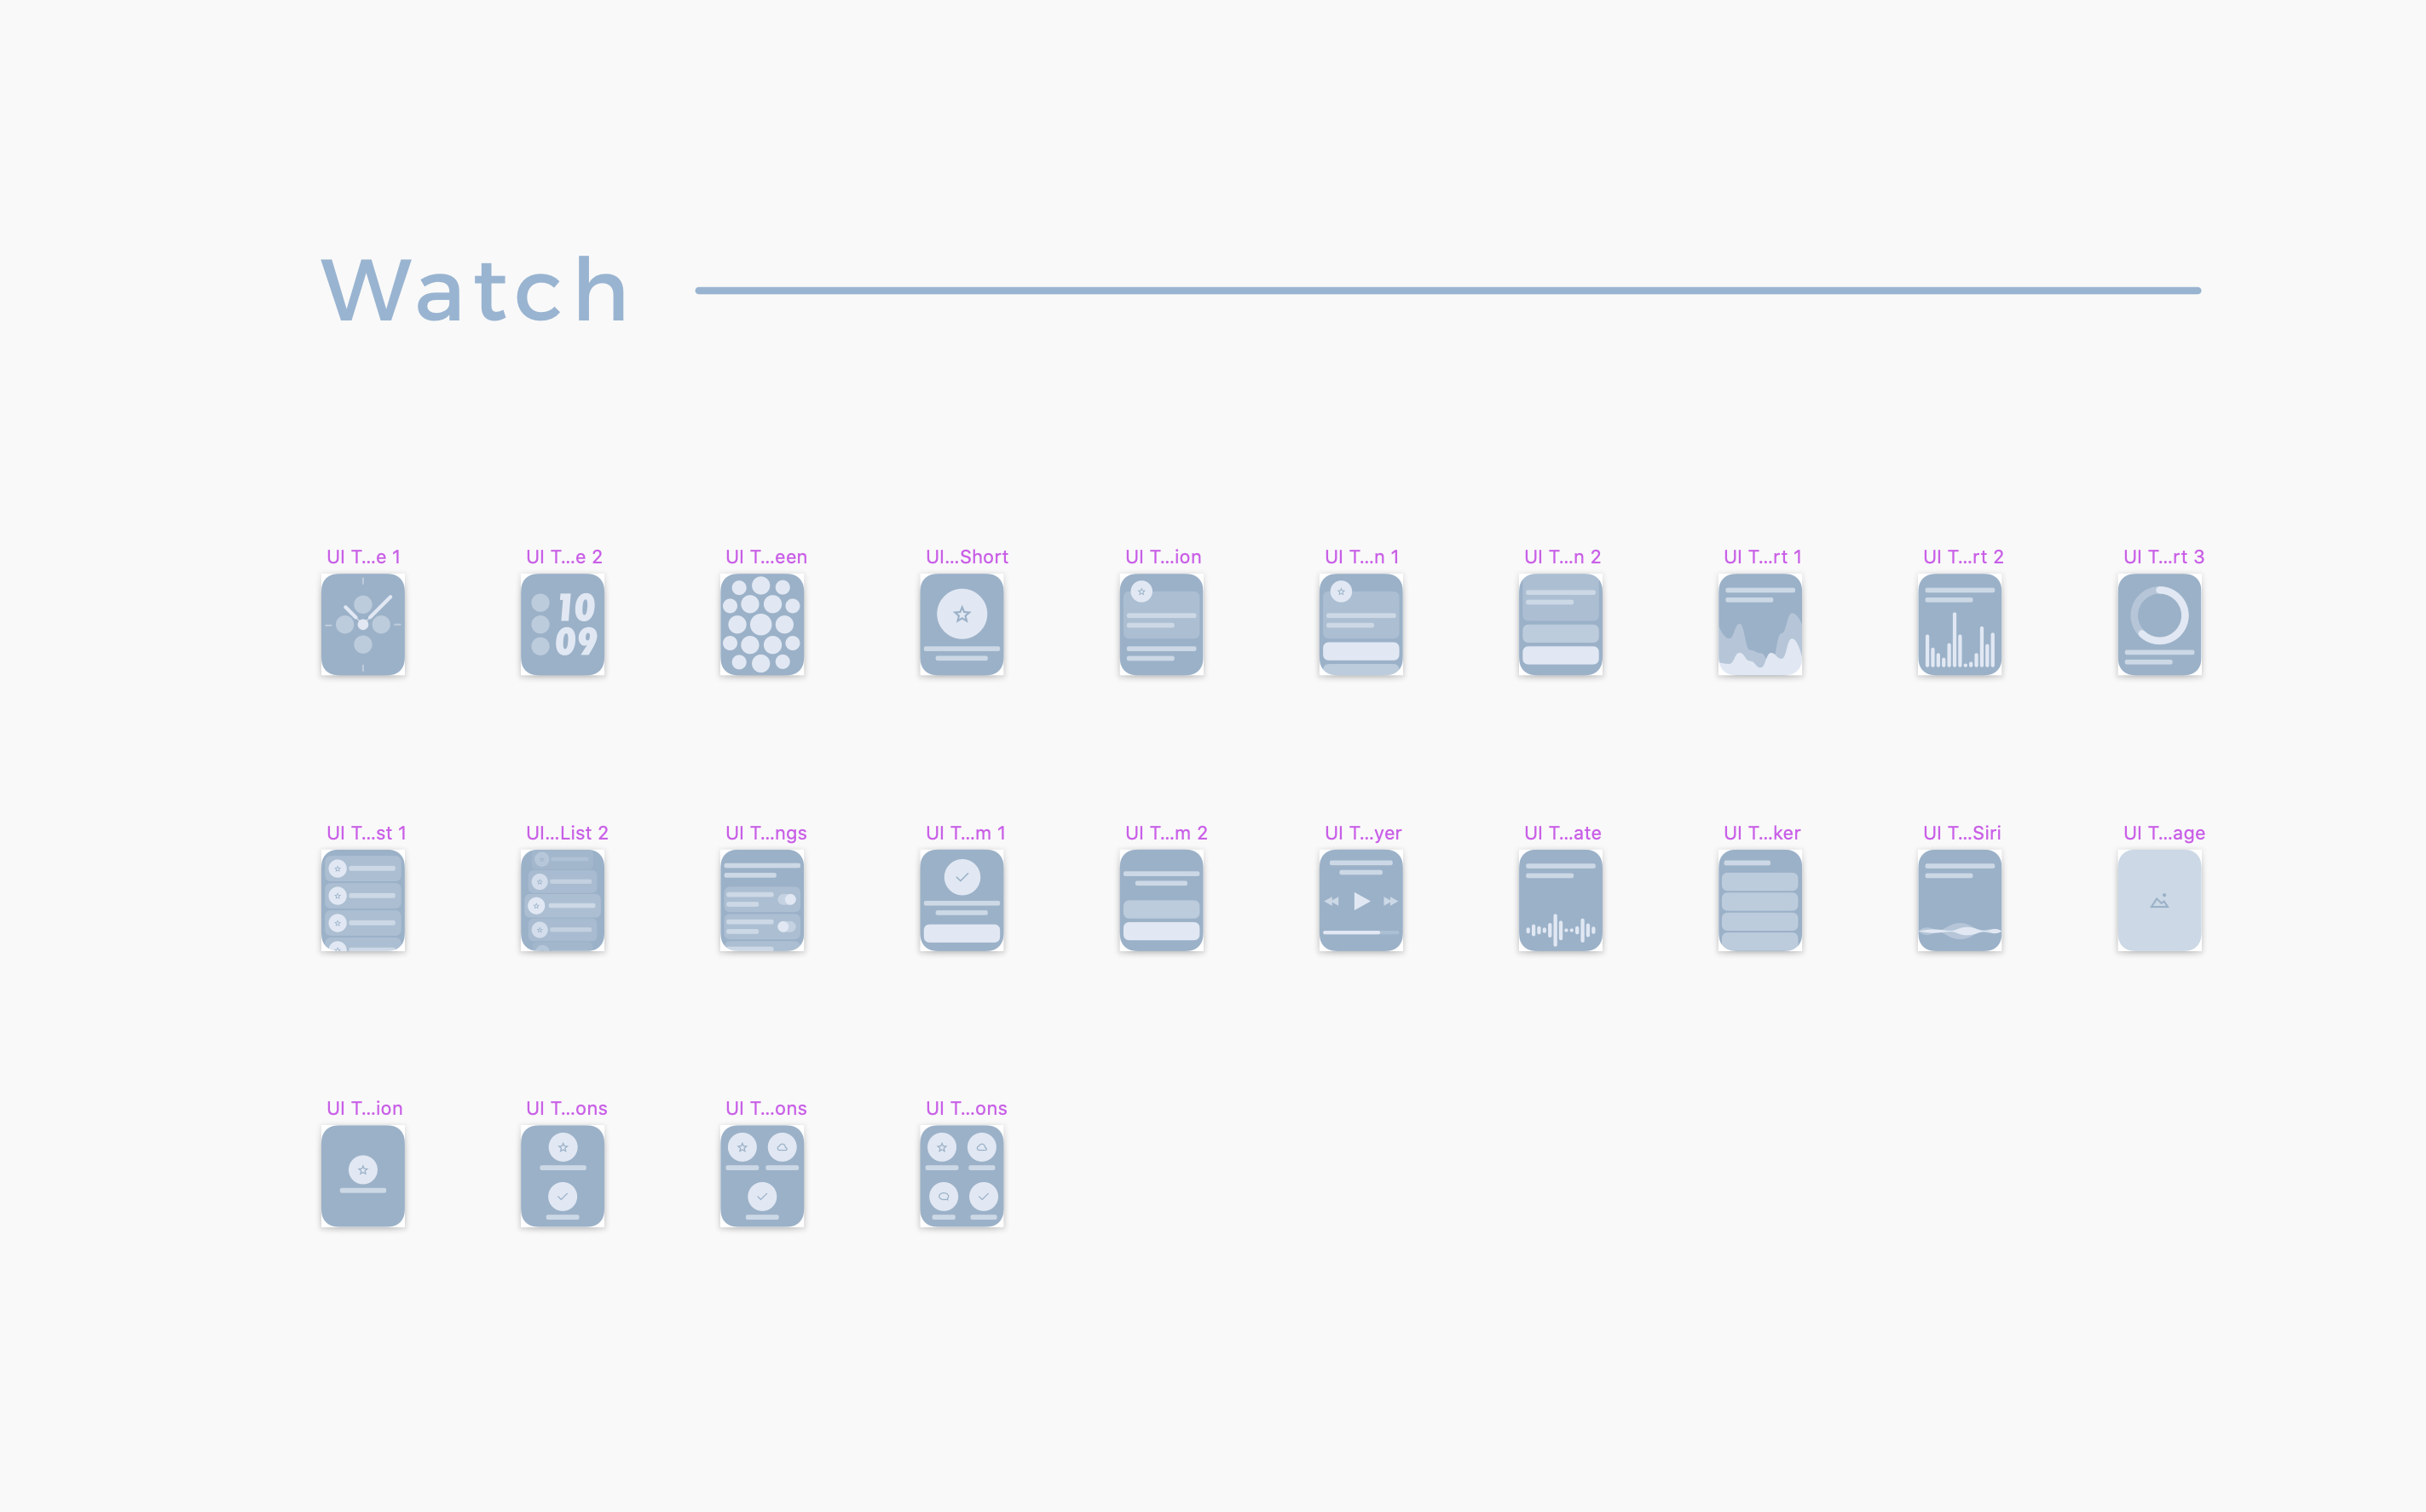
SQUID is a library for Figma and Sketch that allows you to create elegant User Flows in a convenient way. Flows appearance may be customized to match the brand of the company or the project within a few clicks. All User Flow connections stretch and resize to adjust the appearance to your User Flows. SQUID may be used to demonstrate flows even at the beginning of the project because it contains the set of more than 128 Web, Mobile, and Wearable UI Templates.
If you have got mockups created in Figma can instantly use them in their flows because SQUID is adjusted to be used with 1x mockups. Thanks to this, SQUID is a real time-saving toolkit.
Where can I get SQUID?
SQUID is a premium library. It can be purchased from the official site.
The Newsletter Subscribers of UXMisfit.com can get a 15% discount for the library.
Ok, enough of introduction, let me show you how to configure the library and how to use it efficiently.
Adding SQUID as a Library
The best method to efficiently use SQUID is to add it as a Figma Library. Thanks to this, you will be able to maintain better consistency within your project and team. With these simple steps, you will quickly add SQUID as a Library:
Note: To create Libraries for Teams, Figma requires a paid account.
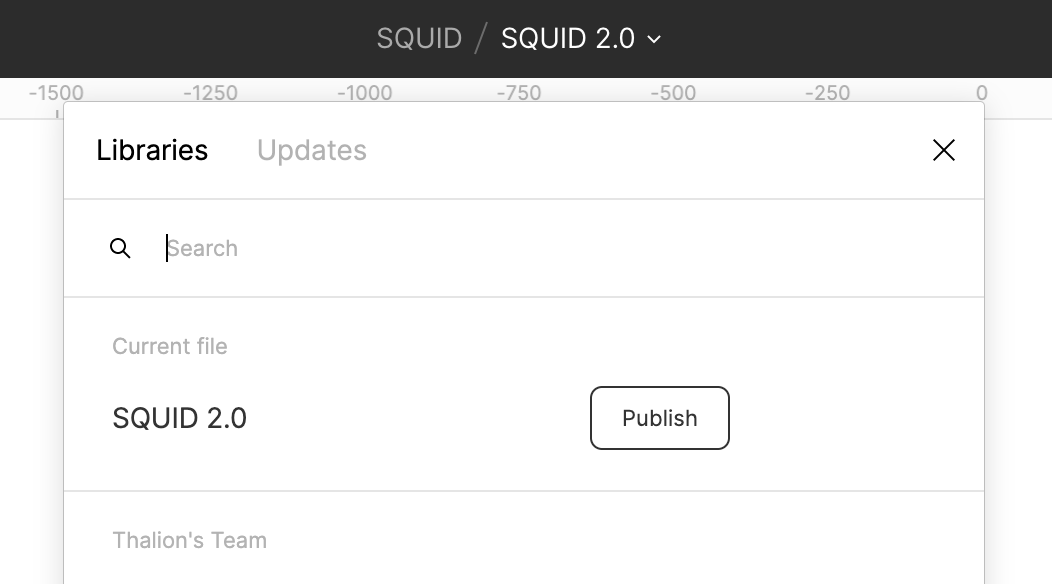
- Open SQUID.fig with Figma.
- Switch tab to Assets (by default Layers tab is selected) in the right panel.
- Click the book icon (the top right corner) to open Libraries Modal.
- Find SQUID 2.0 and click Publish
- Voila! You may create a Team project called SQUID and click Move. Thanks to this, SQUID will be available as a Library for all Team projects.
To learn more about managing Libraries in Figma read the Libraries Documentation
Using SQUID without settings it as Library
To create User Flows, you may use SQUID as a regular Figma file. The best way to create flow right inside the SQUID file is to create a New Page, so no other elements will interact with your content.
The Default Font
The default font for SQUID for Figma is “Roboto”. This is Google’s Font already present in Figma.
You may always customize all Text Styles to match your company or project brand.
Library Usage
Creating user flows with SQUID is very simple. For the most efficient workflow, you should use Search present in Assets Menu. Let me show you how to use the kit, but first, let’s learn the naming convention to use flows as fast as possible (without knowing names of flows, you may also browse the assets to find specific elements).
Naming Convention
SQUID 2.0 enhanced the naming convention well-known from the previous version for its ease of use. Now the names are shorter, and they should be even faster to use. The scheme is the following:
“flow type” + “initial direction” + “direction” + “final direction”
How is it look in practice?
Flow / Right / Up Right
Flow Tap / Right / Up
Flow Double Tap/ Right / Up Back
Flow Dotted / Right / Up Back Half
Flow Long Press/ Right / Straight
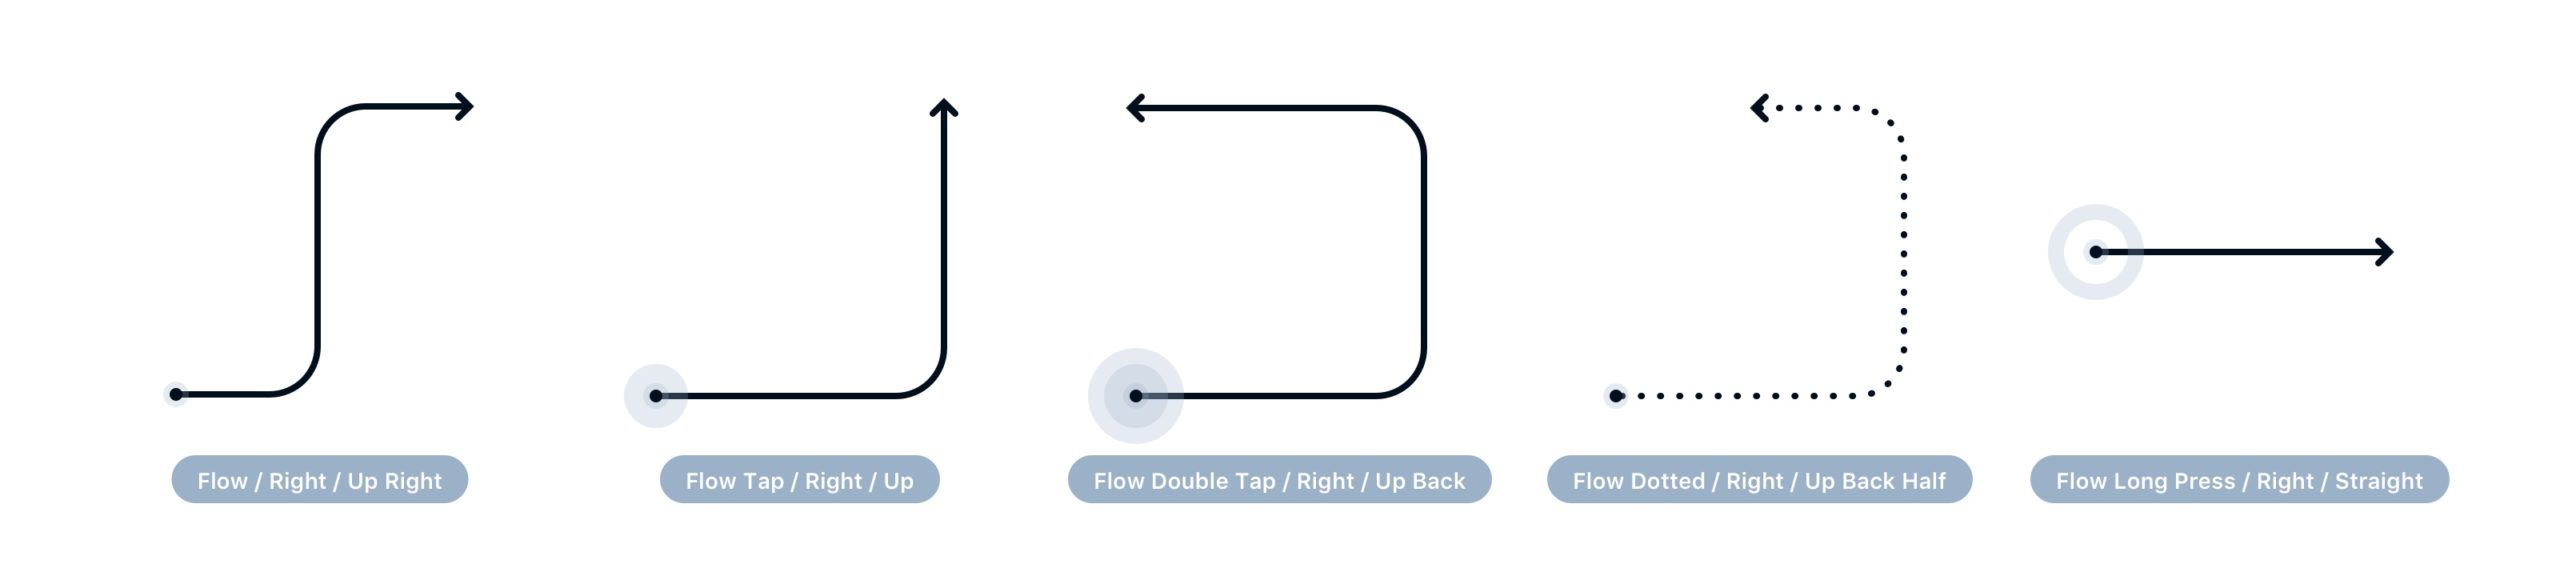
As you can see, even if you use a fly-out menu, all connections are grouped by their initial direction, so finding the one you need is also quick.
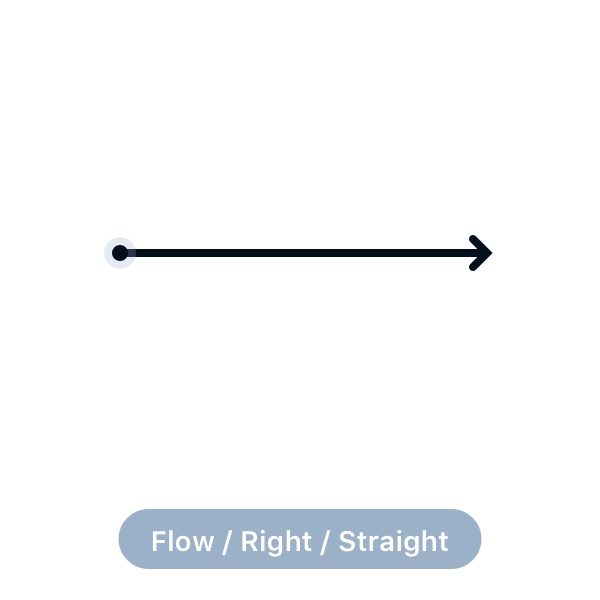
Exceptions for faster usage
As you may notice above – if you want to get the most simple linear flow line (no curves), just type straight after the initial direction.
What’s more, for the flows that go in a horizontal direction and return to the initial one – type “Back” or “Back Half” to get “C” shaped line quickly.
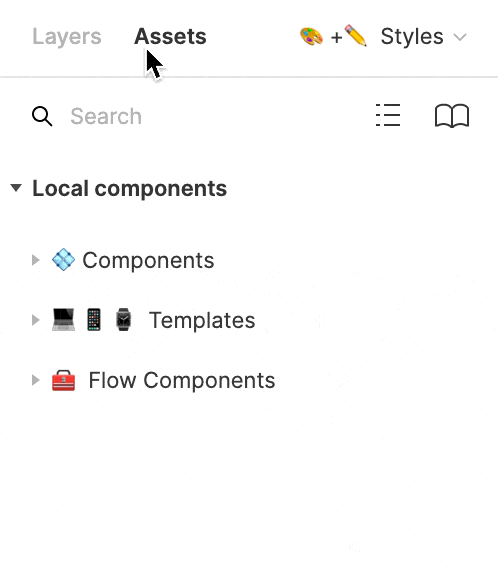
Finding Components
To use SQUID, open Assets Pane (switch the tab from Layers to Assets in the left pane), and start typing inside the Search input.
Search right inside Figma is very fast, so when you know the naming creating User Flows is extremely quick.
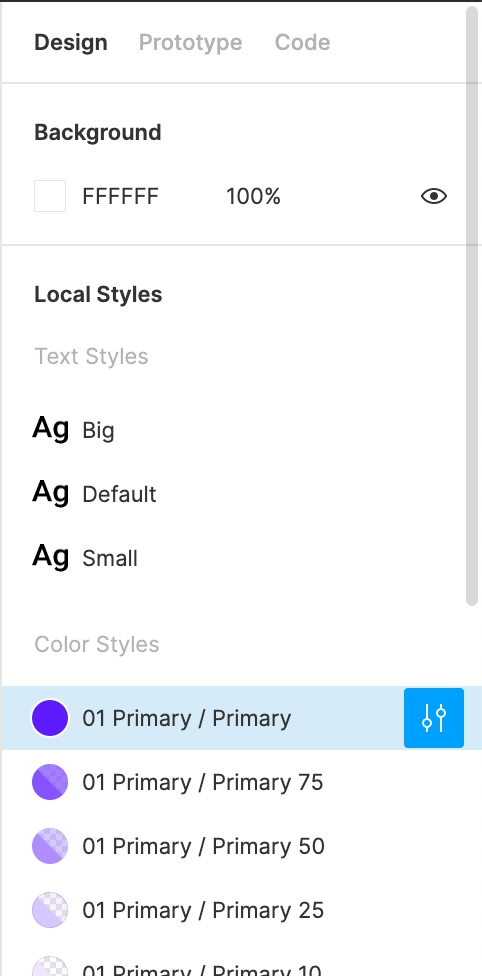
Style Customization
To quickly change Color or Text Styles, go to 🎨+✏️ Styles Page – here you may preview all available styles.
To change text or color style, pick the one you want to modify from the right pane (to make styles visible make sure that you are not selecting any layer) and change font, color, etc.
Components Customization
To edit the appearance of specific Flow Symbols, look for the core components (the ones on the right of 🧰 Flow Components Page). A modified look of these elements will be spread for all flow elements.
To change the appearance of Blocks or Labels, look for master components (usually filled black ones). The remaining components are made with overrides.
SQUID was made as a Library with customization possibilities in mind, so feel free to change the appearance to match your company or project brands!
Much more than User Flows
The primary goal of SQUID is to create elegant User Flows quickly. But it can do much more. The library may be successfully used to visualize all kinds of diagrams, site maps, customer journeys, or even mind maps. It’s a universal kit for UX Deliverables.
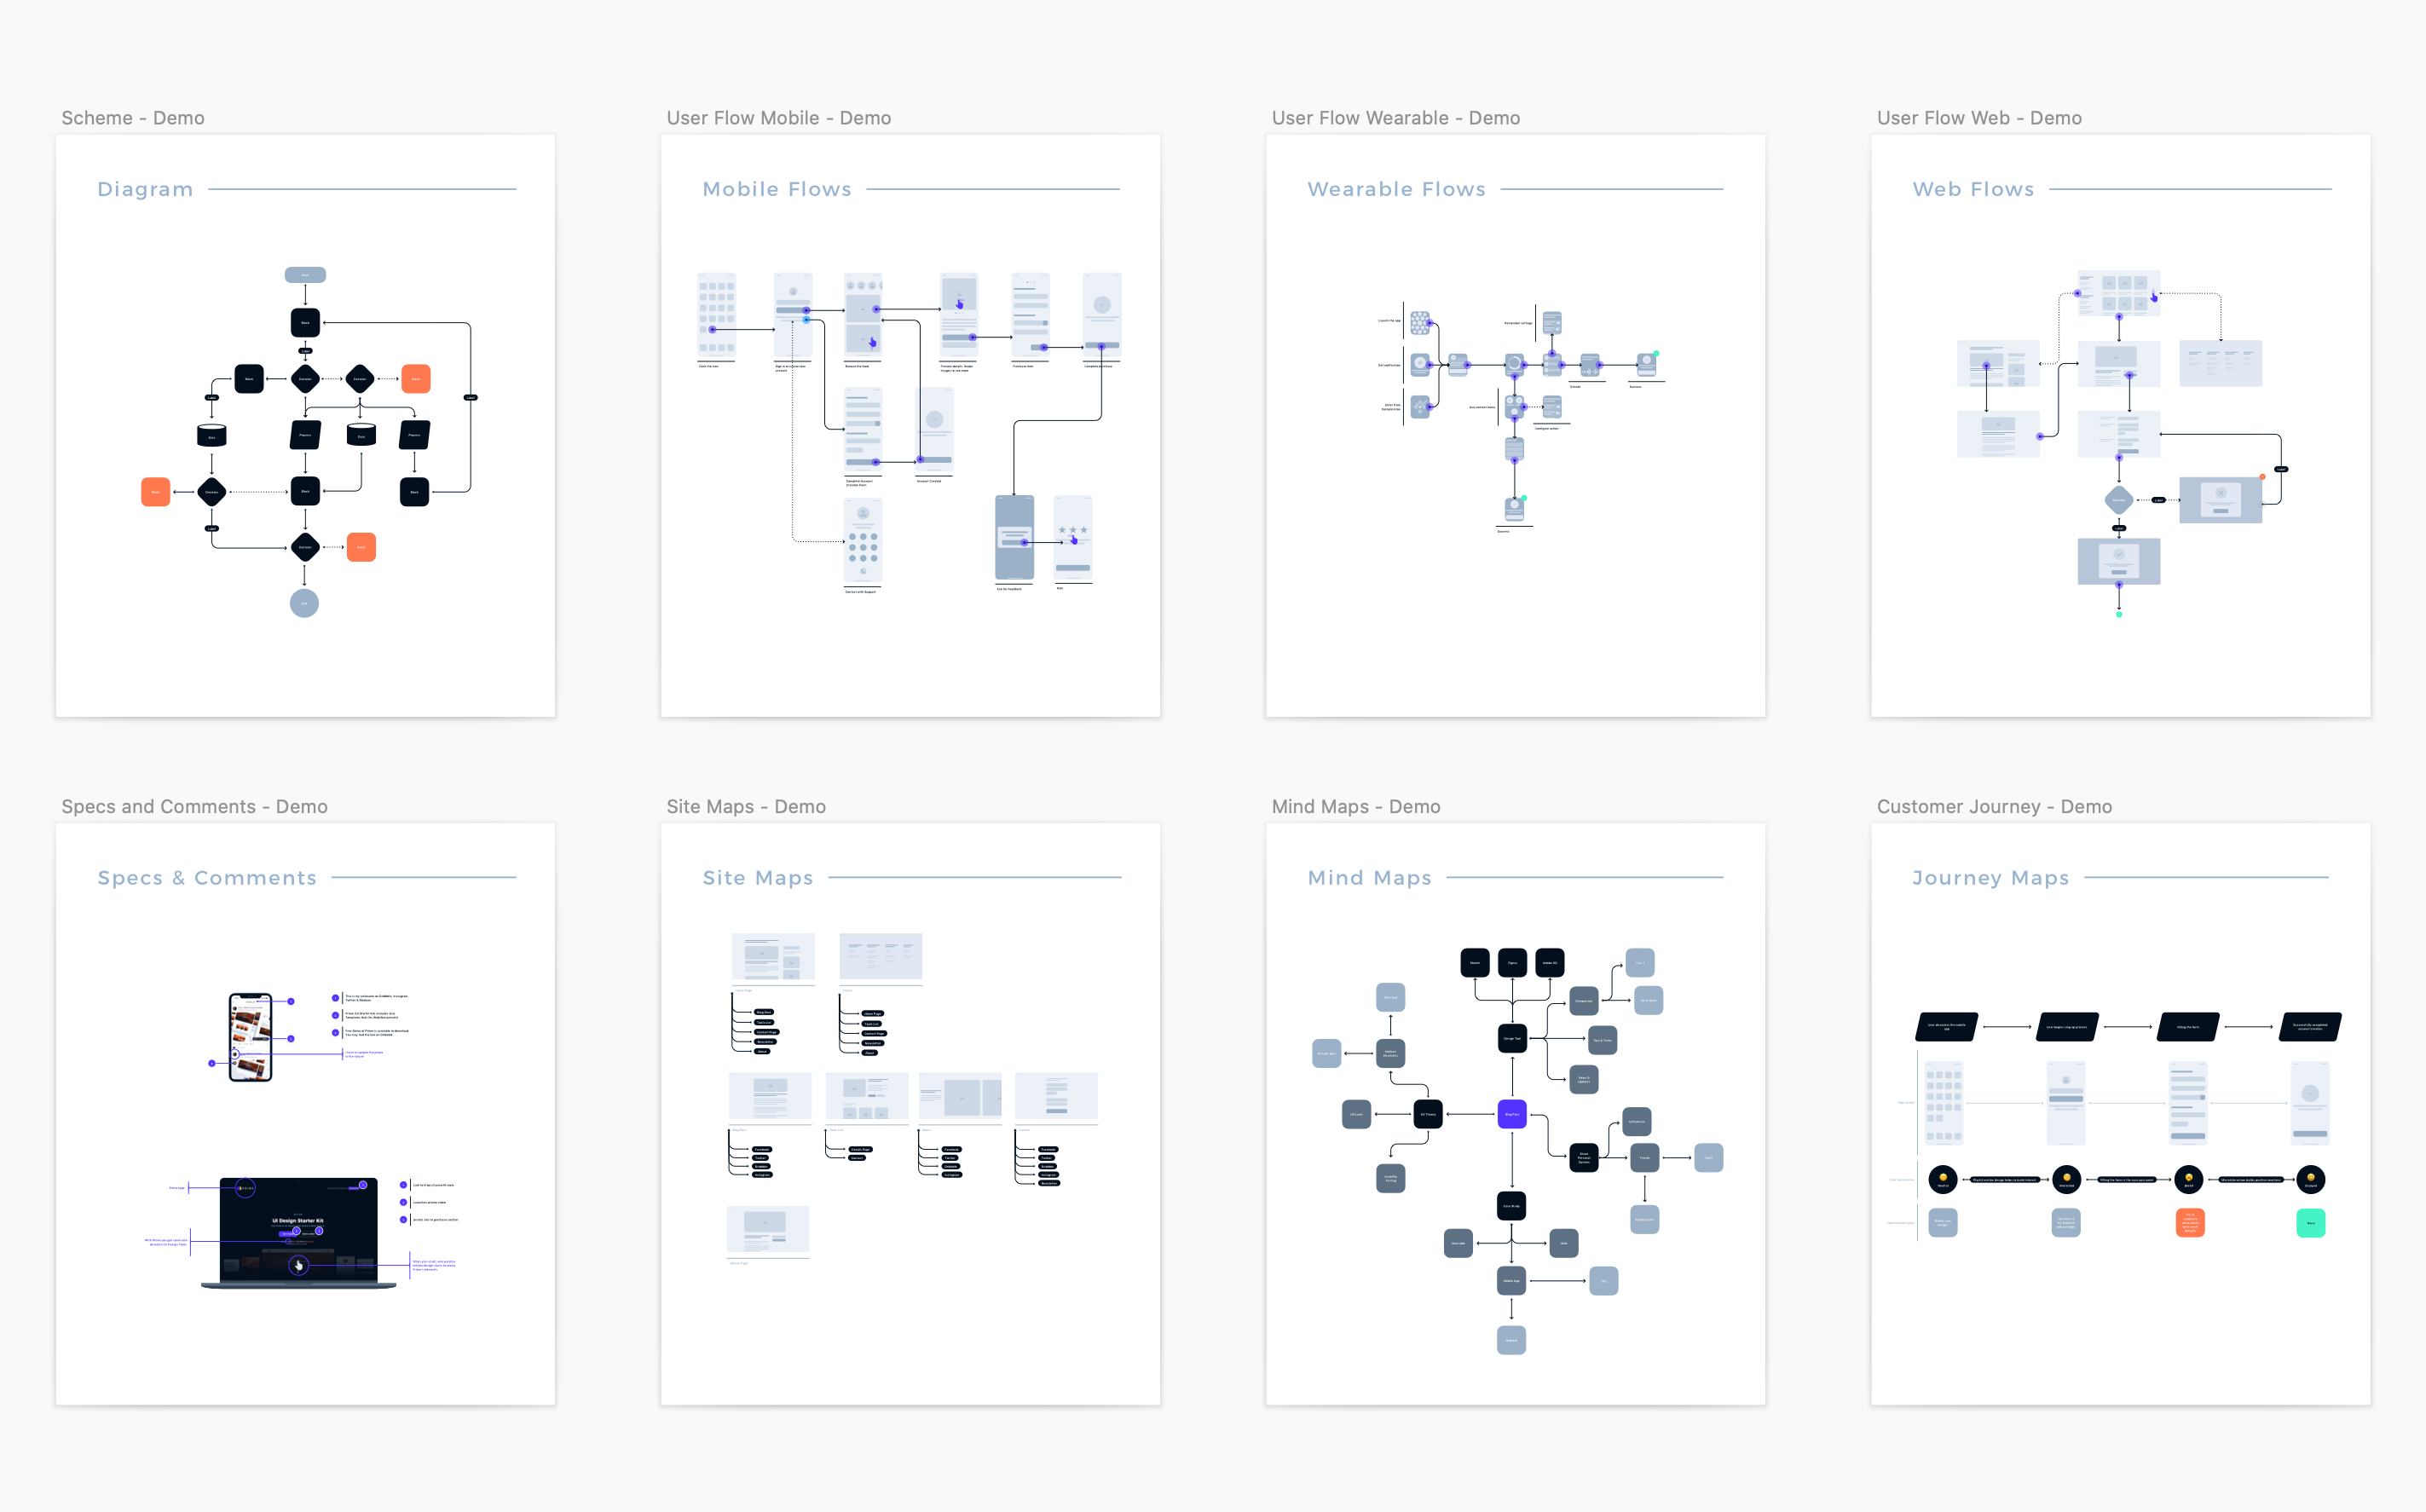
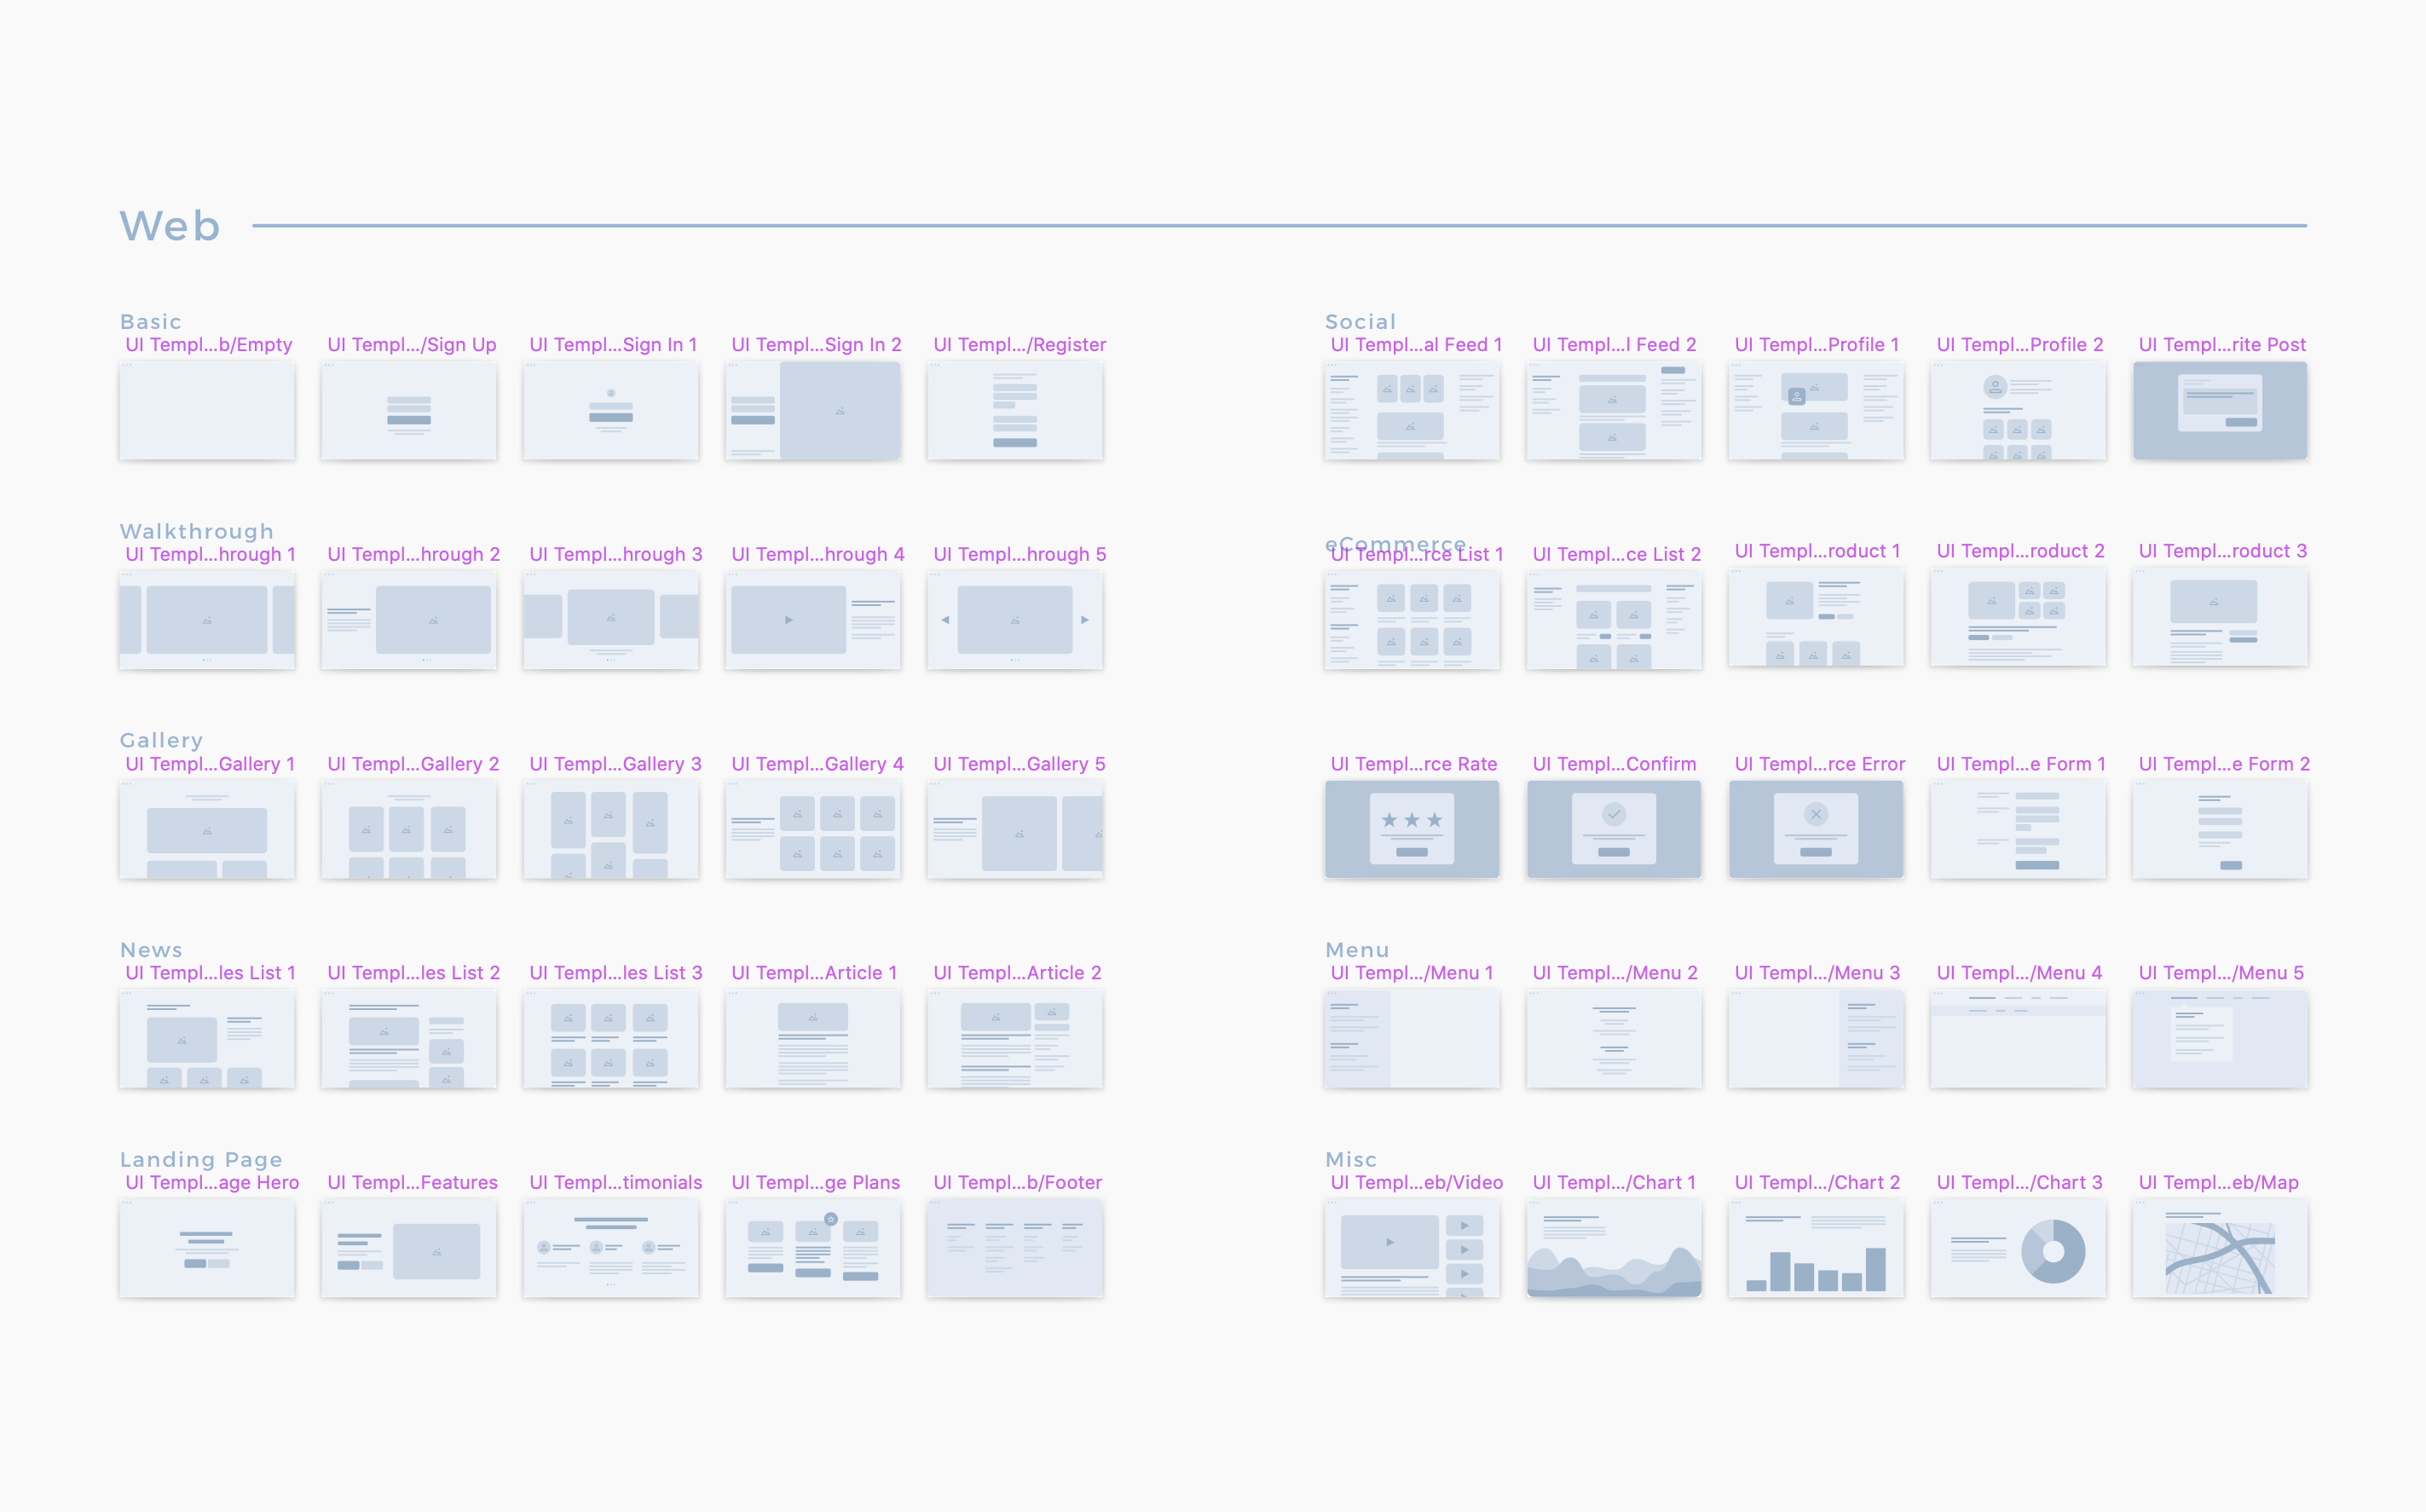
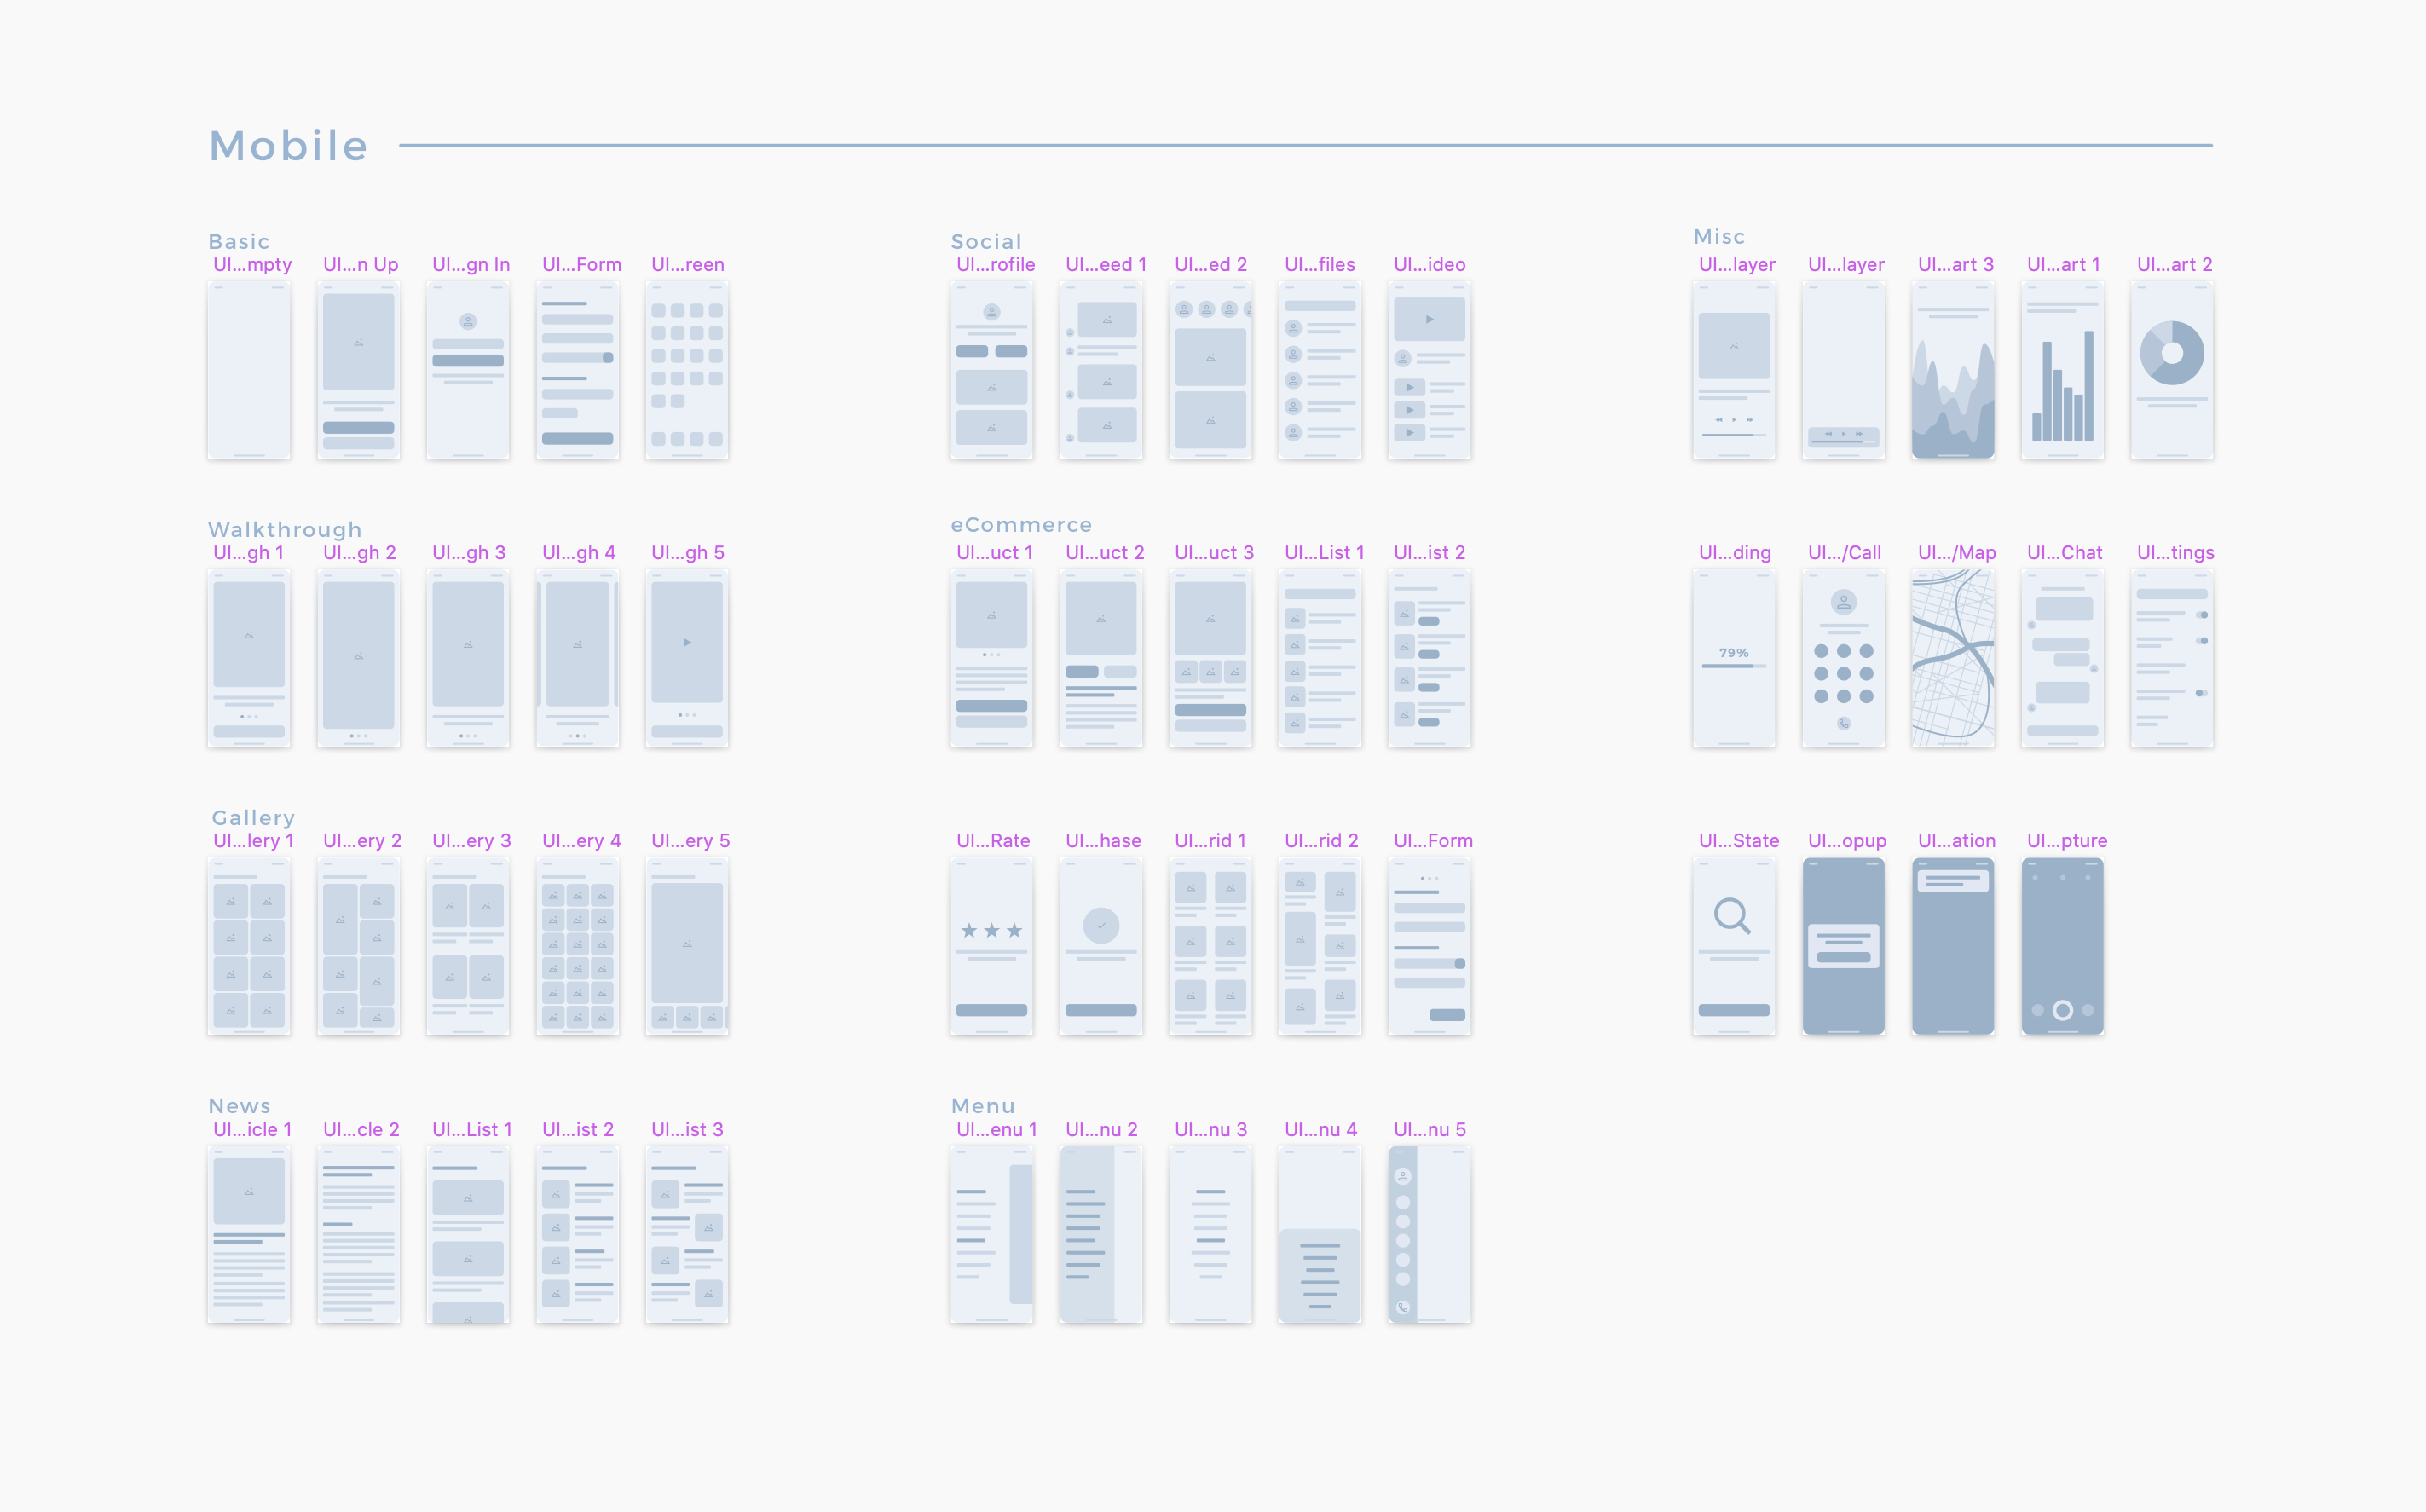
To support designers and the team, you can prepare flows and design processes even without making your own mockups. SQUID includes 128 UI Templates for Web, Mobile, and Wearable apps. They are used to mock the flows and validate ideas on the early stage of the projects.
Summary
This quick start guide shows the configuration and usage techniques of SQUID. If you have got more questions, feel free to message me.
By the way!
If you use Sketch, there is also another kit called Prime. It is a UI Design Starter Kit that may be used to create the Design System and UI Library. SQUID and Prime use the same smart techniques for Sketch. See it in action.